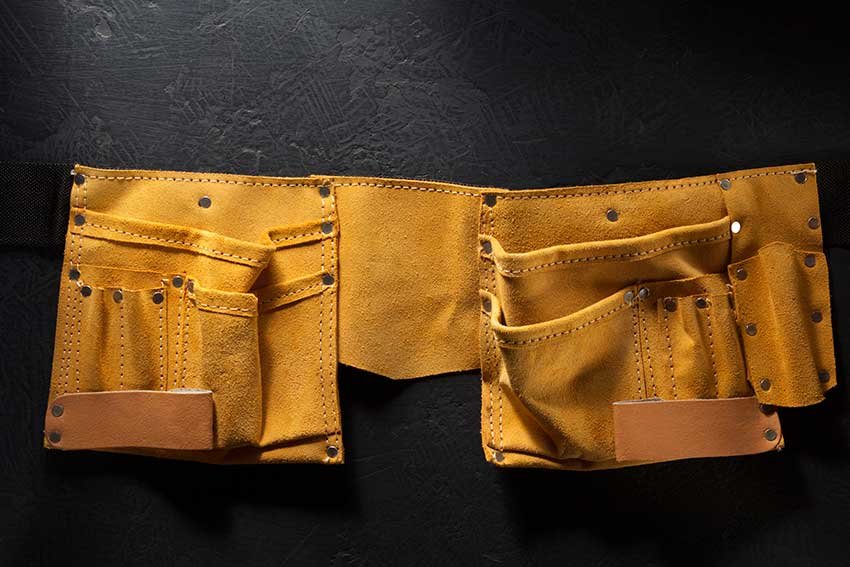
Tool belts are essential tool carriers for professional workers such as carpenters, framers, electricians, roofers, and many more fields of work. Generally, tool belts are manufactured professionally but you can make these at home using your basic skills with a few nearby things. Today, we’ll teach you how to make a tool belt sitting at home.
Check Today’s Deals on Tools!
This is not a hard job and needn’t anything special to do. As a DIY enthusiast, you can make the tool belt within a few hours. Let’s learn first and make your own tool belt!
Complete Guide on How to Make a Tool Belt
The basic actions for making the tool belts are almost the same for different materials specifically leather, canvas, cotton, fabric, nylon, polyester, etc. Preparing the essential things according to a perfect plan is the key, then you have to measure and cut them and finally assemble them properly.
Though there are various tool belt types on the market, we will talk about the tool belt construction processes using your old jeans in two different methods.
| Step | Action | Details |
|---|---|---|
| 1 | Gather Materials | Pair of pants Fabric strap Tailor’s chalk Scissors Sewing machine Sewing needle and thread Metal buckle/hook Measuring tape Rivets Ruler Iron |
| 2 | Sketch & Cut Parts | Draw designs for: Waist belt 2 large pockets 4 small pockets Hammer strap Cut pieces using scissors. |
| 3 | Make the Belt | Use the pant’s waistband or fabric strap. Cut and sew to fit waist size. Ensure width is at least 2 inches. Add a hook, buckle, or button for fastening. |
| 4 | Prepare Pockets | Sew together the large pockets. Add small pockets to each large pocket. Reinforce with rivets and stitching. |
| 5 | Add Hammer Strap | Position hammer strap at the center. Use double stitching for stability. Add more straps for extra tools if needed. |
| 6 | Assemble & Finish | Join all parts together. Fix the position of pouches and hammer strap. Sew them to the belt. Polish with an electric iron. |
1st Method: Making Every Part of Tool Belts Out of Jeans
Step 1: Things You Require to Make a Tool Belt
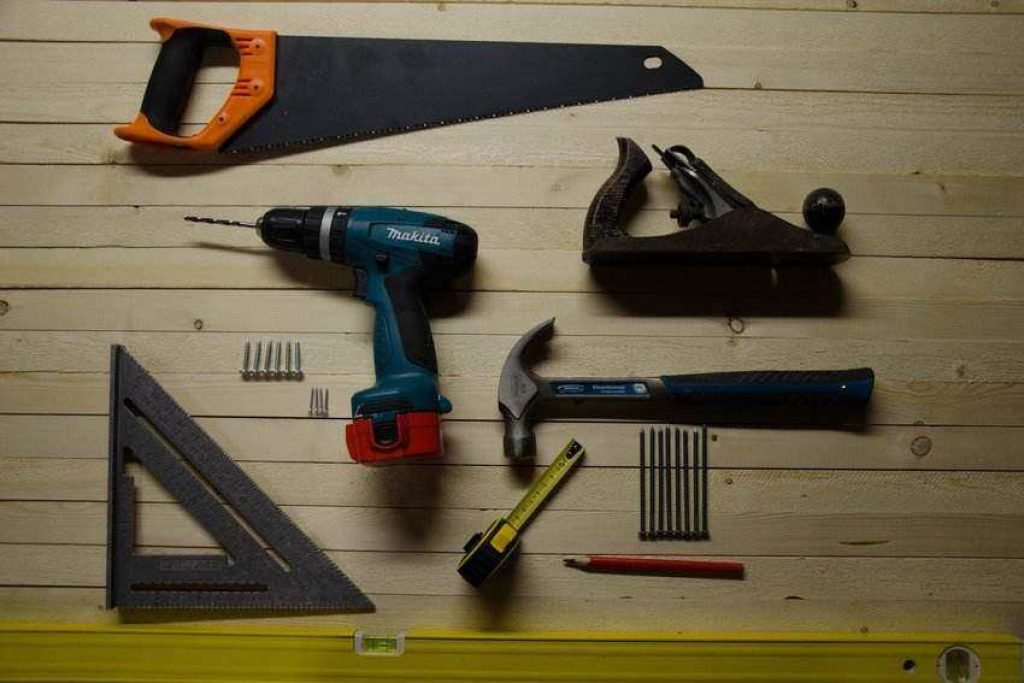
Similar to other DIY projects you need some essential raw materials to make a tool belt (i.e. framing). The main components are-
- Pair of pants
- Fabric strap
- Tailor’s chalk
- Scissors
- Sewing machine
- Sewing needle and thread
- Metal Buckle, hook
- Measuring tape
- Rivets
- Ruler
- Iron
Step 2: Sketching and Cutting into Pieces
Now, you have to draw the design of the main parts of the tool belt. The crucial parts that you need to prepare the belt include-
- Waist belt
- 2 large pockets
- 4 small pockets
- Hammer strap
You can make your required sizes and dimensions demo parts with hard paper and draw lines with chalk or marker to the supplied raw parts. After sketching the parts, you can cut them into pieces with a sharp scissor.
Step 3: Making the Tool Belt
The waistband of the pant itself can be used as the belt. You can also make it from the fabric strap. According to your waist sizes you need to cut and sew the cloth. To increase the belt’s stability, you should add multiple stitching there. It is recommended not to make a tool belt less than 2-inches wide.
After making the belt, you should add a hook or buckle for fastening. If you can’t manage the buckle or hook, a simple button can be used then to clip the belt. For metal buckle securing, you need to create punch holes in the belt end. You can also use the belt loop. To avoid this hassle, you can use a plastic buckle.
Step 4: Preparing the Pouches and Pockets
The pocket parts that you’ve cut already, it’s time to sew them together. Firstly, sew the two parts of the large pockets, then add the other two small pockets to each big pocket. Similarly, complete the other side pockets sewing. For making the construction stable add rivets and stitching in the pouches and pockets end and tension points.
Step 5: Adding Hammer Strap
The Hammer holder is capable of carrying large tools such as a hammer, pliers, and drills. You can affix a hammer strap to the belt or pouches. Usually, the hammer holder is positioned in the center of the belt. Double and more sewn are good for holders’ stability. You can add up a few hammer holders if you have several large tools.
Step 6: Parts Assembly and Finishing of Making a Tool Belt
After completing your necessary parts making, you need to join the parts together. Fix the belt position first, where you want to add the pouches and hammer strap. Then sew the pouches and hammer strap one by one with the belt. Finally, you can polish the tool belt with an electric iron. Now, your tool belt is ready to use.
2nd Method: The Easiest Way of Tool Belt Making Out of Jeans
There is another way and possibly the easiest way to make a tool belt. The essential supplies are old denim pants, scissors, a sewing machine, a hand sewing needle, sewing thread, etc. By following a few simple steps, you can easily prepare the tool belt for use.
Firstly, you have to cut the pant’s legs using scissors, leaving the waistband and the pockets in front and back. Then, cut off the hem borders of the raw piece. Next, trim the end and side of the pockets and make them as smooth as you can.
After that, turn all the pockets back and sew them on all sides. Finally, the tool belt is prepared to use. If needed, you can add or remove the pockets and add suspenders with the tool belt. In the same way, you can make an apron tool belt also.
After finishing making your tool belt, you need to know how you should wear the tool belt.
What Thickness Leather for Tool Belt?
When selecting leather thickness for a tool belt, it is essential to consider the intended use and the required durability. Here is an overview of the recommended thicknesses based on various factors:
Recommended Thicknesses
- General Tool Belts: For most general-purpose tool belts, a thickness of 8 to 9 ounces (approximately 3.2 to 3.5 mm) is standard. This range provides sufficient strength and durability while maintaining some flexibility for comfort during wear.
- Heavy-Duty Tool Belts: If the tool belt is intended for heavy-duty use, such as for electricians or construction workers, a thicker leather of 9 to 11 ounces (about 3.5 to 4.4 mm) may be more appropriate. This thickness can withstand the rigors of constant use and exposure to various conditions.
- Lightweight or Specialty Tool Belts: For lighter applications or if flexibility is a priority, using leather in the range of 5 to 6 ounces (around 2 to 2.4 mm) can be suitable, especially when combined with a sturdier backing or reinforcement.
Additional Considerations
- Flexibility vs. Stiffness: Thicker leather tends to be stiffer, which is beneficial for structure but may reduce comfort. If comfort is a concern, consider using laminated layers of thinner leather (e.g., two strips of 5 oz glued together) to balance flexibility and strength.
- Type of Leather: Full-grain leather is often preferred for its durability and ability to develop a patina over time, making it both functional and aesthetically pleasing.
- Construction Techniques: When constructing a tool belt, ensure proper stitching and reinforcement at stress points to enhance longevity, especially if using thinner materials.
Ending Words on How to Make a Tool Belt
Making a tool belt gives you a chance to test your skills as well as provides great fun. Every DIYer definitely takes the challenge and makes their own great tool belts. Firstly, gather the tools and equipment that you need to finish the project. After that, follow the steps that we discussed here. Take extra care while cutting and sewing the jobs.
Congratulations on completing the DIY tool belt project successfully! Now it’s your turn to share the knowledge and teach others how to make a tool belt. That way everyone gets the pleasure of using a custom design and handy tool belt.
FAQs (Frequently Asked Questions)
Can I Make Leather Tool Belts in the Same Way?
The main construction concept is almost the same, but you need some extra things, for instance, a leather strap, leather dye, mallet, tape measure, hammer, leather conditioner, etc. Leather tool belt making is relatively tougher than fabric or canvas belt making. You need to be skilled enough to prepare this.
Do I Use Conditioner in My Fabric Tool Belt?
No, conditioners are recommended only for leather and such stiff materials. It can weaken the fabric and make it dry. This is not a good practice at all.
How to Sew a Tool Belt?
To sew a tool belt, start by cutting fabric for the main belt and pockets. Hem the pocket edges, then attach them to the main piece. Use bias tape to finish raw edges. Finally, create loops for tools and attach a belt for wearing. Secure all seams for durability.
How do you attach pockets to a tool belt?
To attach pockets to a tool belt, start by preparing the pocket pieces with hems. Align the pocket on the main belt fabric, ensuring the top edge is even. Pin the sides and bottom, then sew along these edges, leaving the top open. For added strength, use a zigzag stitch or bar tack at stress points. Finally, reinforce the pocket by basting it in place before finishing the belt assembly
Can I add adjustable pockets to a tool belt?
Yes, you can add adjustable pockets to a tool belt. This design allows pockets to slide along the belt, enabling you to position them for comfort and convenience while working. For example, a tool belt can feature multiple pockets like a multi-tool pocket, measuring tape pocket, and hammer pocket, all of which can be adjusted as needed