A tool belt is a great assistance to organize your tools and allows you to find out required ones easily in the worksites. Technicians and tradesmen know truly how important a tool belt is in their work.
As a tool geek or a DIY enthusiast, you may be wondering about how to design your own tool belt and pouch. Don’t worry, we are ready to guide you in this regard. You will find lots of methods online that can mislead you from the goal. So, stay with us to get the exact guidelines!
How to Design Your Own Tool Belt and Pouch
Designing a tool belt is not difficult. You just need basic tools and follow a few simple steps to customize your own tool belt. In this article, we’ll explain the process of building your leather tool belt and pouches. Let’s dive into the detailed description.
9 Easy Steps to Build Your Own Tool Belt!
If you are a DIY enthusiast and want to make your own tool belt, we have got you covered. Just follow these steps and you can easily customize your own tool belt. These steps include:
| Step | Description |
|---|---|
| Gather Materials | Collect leather, thread, tools, rivets, buckles, and accessories needed for the tool belt. |
| Create Template | Make or find patterns for each part (pouches, pockets). Measure dimensions for belt and pockets. |
| Prepare Leather Sheet | Clean the leather, smooth it if needed, soak it in water, and cut the pieces according to the template. |
| Mark and Cut Leather | Mark the leather using the template and cut out pieces for the belt, pouches, and pockets. |
| Add Belt Features | Curve the belt’s end, punch holes for buckles, and add rivets for secure fastening. |
| Assemble Pockets | Stitch pockets and pouches together, adding flaps for smaller items and open pockets for larger tools. |
| Design Holsters and Hooks | Attach holsters for hammers and hooks for larger tools to the belt using fabric or nylon stitching. |
| Attach All Parts | Connect pouches and pockets to the belt on both sides, ensuring balance and ease of use depending on your dominant hand. |
| Dye and Finish | Dye the belt, add text or patterns if desired, and smooth the edges with sandpaper to complete the design. |
Gathering Materials and Tools
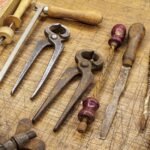
The most required tools needed for designing a leather tool belt are-
- Leather sheet
- Leather hole punch
- Leather mallet
- Synthetic thread
- Leather dye
- Hammer holster
- Sewing machine
- Cutting tools
- Metal buckles
- Measuring tape
- Rivets
You have to purchase most of these materials, tools, and accessories. After gathering all the necessary things, it’s time to plan how you build your own tool belt. One of the major parts of that is creating the template.
Creating Template
Before starting to design, you must create patterns or find online templates for each part so that you can easily design your own leather tool belt. For each part, you need three dimensions i.e. length, width, and depth. According to the pocket shape, you have to create the pattern.
In this stage, you need to think about how many pockets and pouches you are going to design. If you can’t manage any pattern you should take an old tool bag measure all the parts and make your own template.
Now, your task is to prepare the leather sheet for the design.
Make Leather Sheet Ready

Firstly, clean the leather sheet with a wet cloth. Dirt and debris may be accumulated over there. If they feel rough, make them smooth with sandpaper. But don’t make them too thin, otherwise, they will be worn at a small weight of tool or a hole will form at prodding.
Then, soak the leather in water for 30 minutes. But, never let them soak for more than an hour as they might be dumped and you can’t craft your design correctly.
Next, you have to draw lines on the sheet and cut them in the right dimensions.
Marking and Cutting into Pieces
With the help of patterns, you need to mark them on the leather sheet and cut them into pieces according to your need. Start with marking in the leather sheet for making your tool belt.
If your waist size is 39 inches, it is recommended to take its length at least 8 inches more and the belt width should be at least 2 inches wide. You know, the narrow belt creates discomfort in loaded conditions.
For example, you want a 47 inches long and 3 inches-wide belt. Mark on the leather sheet with any marking tools or pencil. In this case, your old belt may help for easy marking. Then cut the piece with any cutting tool such as a knife, scissors, etc. Sometimes you may need an angled box cutter to cut the thick leather.
Similarly, you can mark and cut all parts for pouches and pockets. Typically, the tool belt consists of different pocket pouches with dissimilar sizes. For instance, the big pockets are 20 inches long and 8 inches wide. The small pocket size maybe 3 inches by 2 inches. Usually, pockets come in square or fold shapes. It totally depends on your choice.
So, you cut all the pieces. Now, you have to complete these parts.
You May Also Like: A Comprehensive Guide To Repair Your Tool Belt
Add Necessary Features with Tool Belt
After cutting the belt, you need to curve one side permanently. Make a hole with the punch machine and wet a rivet for making a curved end. Before riveting don’t forget to set metal buckles there. Make sure, you have created a few holes to fasten the belt with buckles depending upon your waist fitting. To create holes, you can use the leather punch.
Now, wear the tool belt and check for a while whether it’s appropriate or not.
Joining Tool Pockets and Pouches

Normally, you need two pouches and at least 10 different pockets for storing the stuff. You’ve already cut the pockets and pouches parts. Now start assembling the pockets. At first, join the largest pockets then attach the smaller pockets over the big pockets. Then stitch them with synthetic or nylon thread.
Depending upon your necessity, flap over the pocket or make the pocket open. Assure that you are using hard and thick leather for the open pocket. Then, roll the leather over the mouth of the pockets and stitch them using threads. You can use wood blocks to ease the folding or rolling of the pockets.
The flapped pockets allow small tools such as nails, screws, and small tools. On the other hand, open pockets can store large tools. If you don’t want to add many large pockets in the belt, you can add small flapped pockets over the large open pockets which will save space. You need steel buttons to make the flap pockets workable.
Now, you need a holster and hooks to add larger tools. By Adding these, organize your tool belt to help you work more efficiently.
Holster and Hooks Designing
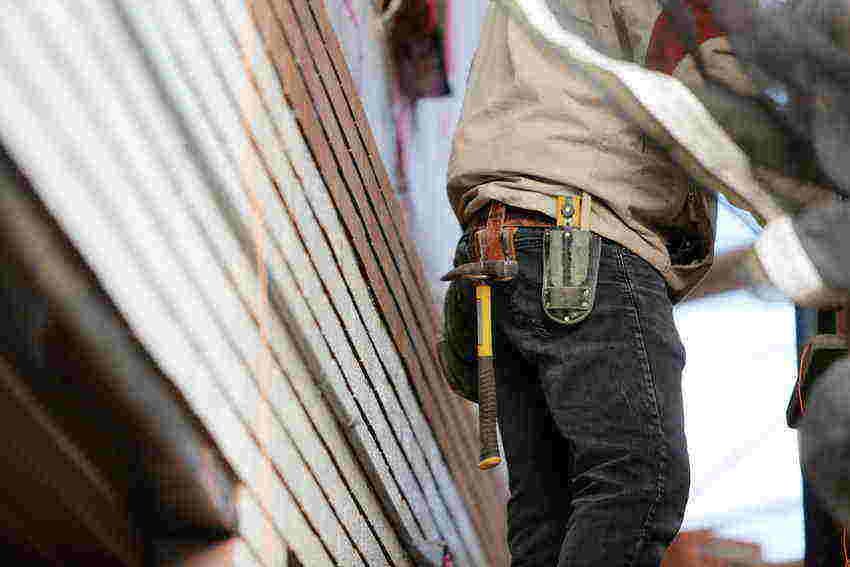
Typically, the holster is used for holding a hammer and is made of steel or wood. You need to purchase the holster, but you can also make them using leather to hold the hammer temporarily. Sew the holsters with a belt using durable fabric or nylon. Never attach them in front of your leg as it will create discomfort while walking. Always put them to the side.
You also need a few hooks for hanging large tools. To do so, you’ve to cut the leather and make several hooks and add them to the belt. For storing tape measure, you can add a tape measure clip to the upper part of the pouch. If you want, you can also add handles with the pouches.
Let’s start assembling all the parts together.
Attaching The Parts
After completing the belt and pouches construction, you have to connect them through strings. Make sure you add them on both sides for perfect balancing. You might sit for a while in the working situation, so don’t add pouches at the backside.
If you are a right-handed man, fix the main pouch on your dominant side. For left-handed men, this will be the opposite of easy and convenient tools access. Then, attach the hooks to the belt by glue but you can stitch them into the belt for making them more durable.
After joining all the tool belt parts together, wear the belt and check if everything is okay or not. If it’s perfect, give a proper finish to all the edges and uneven sections with sandpaper.
Dyeing and Finishing
Now, you can improve the belt with the desired dye such as dark color, wooden texture, tan color, etc. If you want, you can also add text, and shapes, or burn the surface according to your choice. To insert any shape, you should use carbon paper on the surface. This is a good idea to use permanent color to paint any shape or you can use a sharp blade to craft in the leather.
So, you have completed all the steps of the tool belt design. Now, check your tool belt fitting. Congratulations!
You May Also Like: How To Clean A Tool Belt? 5 Easy Steps To Follow
How To Setup Own Tool Belt?
Setting up a tool belt effectively is crucial for maximizing efficiency and comfort on the job. Here is a short guide on how to do it:
Choosing the Right Tool Belt
- Fit: Ensure it sits comfortably below your waist.
- Padded Options: Consider padded belts for added comfort.
Organizing Your Tools
- Dominant Hand: Place tools for your dominant hand on that side.
- Core Tools: Include essentials like a tape measure, utility knife, hammer, and chisels.
Weight Distribution
- Balance: Distribute weight evenly; consider suspenders for heavier loads.
Additional Tips
- Avoid Overloading: Only carry frequently used tools.
- Accessibility: Keep commonly used items within easy reach.
- Ergonomics: Adjust for comfort during use.
If you follow this setup and organize your tool belt, it will improve your efficiency and comfort while working!
Conclusion
You can easily make the belt, pockets, and pouches, and assemble them within a few hours. But, without knowing the basics of how to design your own tool belt, it becomes a waste of materials and time. This is why we explain the fact so that you can easily build your own tool belt.
Let’s try it and be a successful tool belt DIYers. After completing your project, start organizing your favorite tools!
FAQs (Frequently Asked Questions)
How do I start designing my own tool belt?
Start by gathering materials like a leather sheet, cutting tools, rivets, and a leather punch. Create a template for each part, including pockets and pouches.
How do I prepare the leather for the tool belt?
Clean the leather with a wet cloth, smooth rough areas with sandpaper, and soak it in water for 30 minutes before cutting it to size.
What size should my tool belt be?
For a comfortable fit, add at least 8 inches to your waist size. For example, if your waist is 39 inches, the belt should be around 47 inches long.
How many pockets should I include in my tool belt?
Typically, tool belts have two pouches and at least 10 different pockets. You can customize the sizes based on your needs.
Can I make a holster for my hammer?
Yes! You can either purchase a holster or make one from leather. Attach it to the side of the belt for easier movement.